Photography is often looked upon as an art, perceived as a skill requiring a certain innate ability and creative talent should a person want to actually take “good” pictures. While there are certainly many elements of artistry in a wide range of photography, a lot of it can be broken down to a science. The goal of this section is to go over some of the basic technology. Additional information is available on the basics of imaging and photography, which can be found here.
This portion of the toolkit includes the following sections:
Equipment Fundamentals
Sensors
The sensor is the light-sensitive element in a camera that captures details that will later be viewed as an image. A lot of attention gets paid to sensors in the marketing side of camera sales – between megapixels, full-frame sensors, crop factors, and video resolution, it seems that there is a lot to think through here. As with many parts of photography, a lot of this is about jargon, and once there is meaning behind the words it all appears a little simpler.
Megapixels: A pixel is the smallest element of detail in an image, being a single point of color that will appear on a screen or print view of an image. A megapixel is one million pixels, and is used to describe how many pixels are in an image overall (width multiplied times height of a pixel count). In this way, an image that is 1,000 pixels wide by 2,000 pixels tall will have 2,000,000 pixels, or two megapixels. The simplest truth is that most modern digital cameras will have a high enough pixel count to be useful in medical imaging. Whether 8 or 21 megapixels, there should be more than enough detail for most clinical settings.
More light-sensitive elements in a sensor (which means more pixels) are not necessarily a good thing. The more densely packed into a sensor these elements become, the more they are prone to “noise” or “grain” in an image, which can appear as a sort of static in certain sections of an image. Note that this only really tends to be an issue with either underexposed images and/or at very high ISOs (we will talk about that concept a little later).
Full-Frame Sensors and Crop Factor: Sensors take the light that comes through a lens and interprets an image. Some sensors are considered to be “full frame”, which means that the image coming through the lens lines up with the sensor and the entire image is captured. Other sensors, which are considered to have a “crop factor”, are a little smaller than the full frame sensors. This means that the image that comes through the lens is larger than the target area, and some of the potential image is not captured. This cropping happens in both the viewfinder and the sensor, so the image is captured exactly as it is seen. Unfortunately, all that is seen is a little less than is available from the lens.
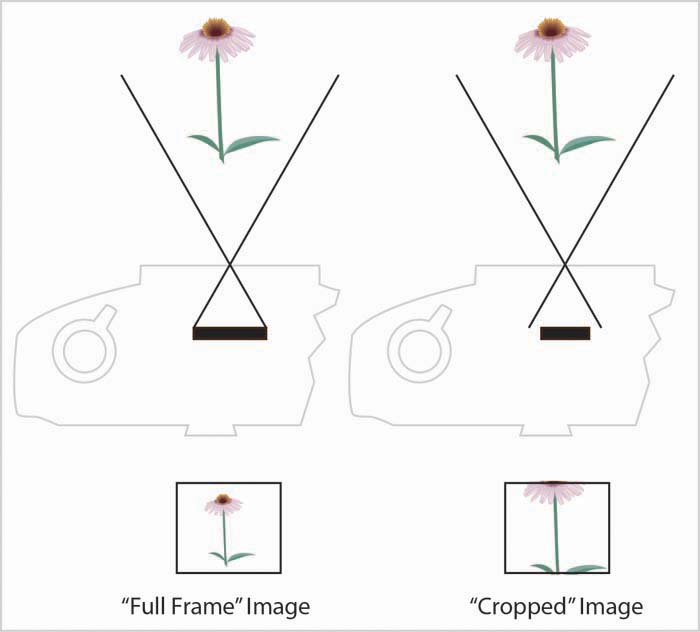
Illustration of Full-Frame vs. “Cropped”
The crop factor often is shown as a certain multiple, such as 1.3x or 1.6x. This means that the length of a lens (expressed in millimeters, such as a 50mm lens) needs to be multiplied by that number to determine its effective “zoom” on the sensor. A 1.6x crop factor sensor would capture an image more akin to an 80mm lens, whereas a full-frame sensor would capture it as a 50mm lens. For wildlife photography, this can be a boon, as a 500mm lens has an effective length of 800 mm. For medical imaging, however, this may be occasionally disadvantageous, as it can make it hard to capture an entire scene. If this talk of zoom and lens length isn’t making sense, read on to our lens section and understand a little more about what those words all mean.
The following three images provide examples of three fairly common sensors and their cropping effect. All images were captured with the same camera settings, lens, and distance from the subject. Any changes in appearance are the result of the cropping effect of the sensor. Note that there are some sensors which perform additional cropping, typically up to 2x.
Video Resolution: At one point, a camera was a camera and a camcorder was a camcorder. Modern devices tend to blur the lines a bit, providing the capacity to record very high-resolution videos on cameras. As the sensor resolution has increased, so too has the video size. While this may provide a fantastic level of detail, the downside is that video files are increasing in size, with HD video needing multiple GB of storage for several minutes of content.
Devices are now often capable of recording high-definition video at either 720p or 1080p resolutions in a widescreen format. Both of those numbers refer to vertical lines of resolution, with corresponding horizontal lines of resolution of 1280 and 1920. The ‘p’ refers to progressive, which means that every single still-image frame of the video is captured at once. The other option here is for “interlaced” video, indicated with an ‘i’, which captures alternating lines of vertical content on alternating frames. This difference becomes clear when looking at stills from a video clip, as progressive images will be solid and clear, while interlaced videos will appear jagged or distorted.
Back to Top
Lenses
One of the hallmarks of a DSLR camera is the ability to change lenses on the camera body. The world of lenses can get confusing pretty quickly, with a whole range of terms, components, and abilities spread across an enormous price range. Many people new to photography will likely utilize the stock lens that comes with the camera, which may be acceptable for a variety of purposes. We will look at what the different lens terms mean, how certain lenses differ from others, and allow you to decide which lenses you may need for your practice.
Lens Basics: Before we jump into a deeper discussion of lenses, we need to clear up some of the terminology around a lens. Lenses redirect and focus light from a scene onto the sensor. Most lenses will have a few key pieces of information included in their name, such as 50mm f/2.8 or 18-55mm f/3.5-5.6, with the possibility of an additional few acronyms after these critical details. The ‘mm’ designation is to describe the focal length of the lens. The lower the number, the “wider” the lens. The higher the number, the more “zoom” it has or the “longer” it is. The ‘f/’ indicates the lowest possible f-stop or aperture of the lens, which is how much light can go through the lens. A lower number indicates that more light can come in.
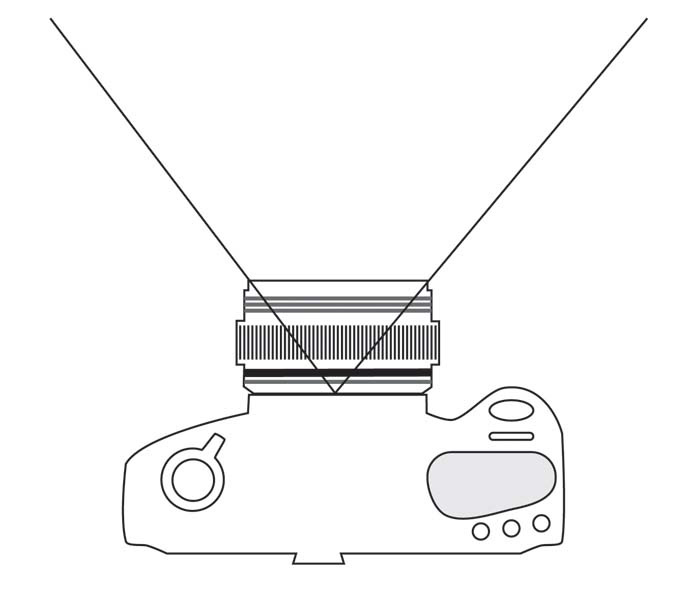
Wide Angle Lens Graphic
Wide Lenses: Wide angle lenses have a short focal length, which is the number on the lens preceding the ‘mm’ on the lens description, often coming in ranges between 14mm and 35mm. This shorter focal length has several significant impacts on the final image. A wider lens can capture more of a scene than a longer lens, which means that an image shot on a wide lens will show more of the subject when shot at the same distance as a telephoto lens. Wider lenses will make subjects closer to the lens appear larger than those in the background, sometimes to very dramatic effect. Some wide angle lenses are also prone to various types of distortion of the image around the edges. These lenses also tend to have a greater depth of field than their longer counterparts.

Telephoto Lens Graphic
Telephoto Lenses: Telephoto lenses have a longer focal length than wide-angle lenses. They are a type of “long-focus” lens that has a focal length that is shorter than the physical length of the lens. These often come in ranges from 85mm through 300mm, though they can get significantly longer for particular specialty, non-clinical applications. The longer focal length will capture less of a subject than their wider counterparts when shot at the same distance. Whereas wider lenses tend to exaggerate distances and size differences, telephoto lenses tend to compress distance and size differences. Telephoto lenses also typically will have reduced depth-of-field in an image.
Prime and Zoom Lenses: There are two additional key descriptors for most lenses – prime and zoom. Prime lenses have a single focal length, which means that there is no “zooming in” or “zooming out” for a photograph. Any changes in framing the photograph will require moving the camera or subject. Zoom lenses offer a range of possible focal lengths, such as 18-55mm, 24-105mm, and 85-300mm. Note that these lenses may be wide-angle zoom lenses, telephoto zoom lenses, or a hybrid. Also pay attention to the f-stop listed for the cheaper zoom lenses, as they will have a range of f-stops to match the focal length.
Macro Lenses: Macro lenses, referred to as “micro” within the Nikon product line, are useful for close-up imaging. Note, however, that these lenses are often capable of focusing on subjects at various ranges, meaning that they are not used exclusively for imaging small subjects.
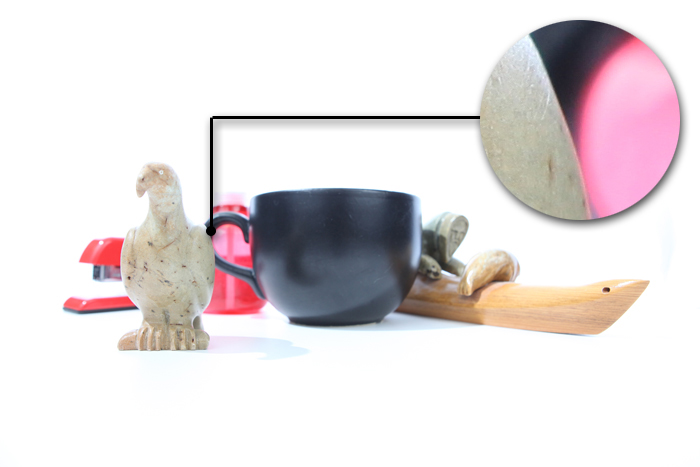
Depth of Field: Depth of field has come up several times in the discussion of lenses. Depth of field references how much of a scene is in focus in the final image. This is of particular significance in clinical imaging as there is often a strong need to preserve detail in an image, and loss of focus or lack of depth of field may reduce this detail. There also may be a need to image a subject with significant topography, such as a nose, eye, and cheek, or lesions with elevation. Generally, wide-angle lenses provide a greater depth of field than telephoto lenses. It is possible to increase depth of field by increasing the f-stop on a lens, though this will reduce the amount of light that reaches the sensor. It is important to be cautious when using a lens with a small f-stop (less than 4), as it may potentially have a shallow depth of field when left at its lowest setting. This is discussed more in the section on exposure, below.


Field of View: Field of view may come up in some discussions of lenses, and it is useful to discuss it here to clarify how it is different from depth of field. Field of view, or FOV, refers to how much of a scene is captured by a lens. As mentioned above, wide angle lenses will capture more of a scene, and thus have a greater field of view. Telephoto lenses have a lesser field of view.
Lenses – Cheap or Expensive: Many DSLR cameras come with the option of “kit lens”, which is added to the camera body at a very low price. Some providers may hesitate to purchase an additional lens, as the prices can quickly exceed the price of the camera itself. Lower price lenses may be sufficient for some or all of a provider’s needs, while others may need to purchase additional lenses to be satisfied with their cameras. Cheaper lenses may be prone to chromatic or image distortions, which can impact the final image in varying degrees. Perhaps most importantly, though, is the fact that most kit zoom lenses will not be able to support a macro light without causing extensive stress to the focus and zoom controls on the lens. If using on-lens lighting, it will be necessary to use macro or other higher-end lenses.
Back to Top
Lighting
The quantity and quality of light on a subject will drastically change the quality of an image. While it is not necessary to have a multi-light configuration with large umbrellas and reflectors, there are a few things that can be done to improve the light in a photo.
Ambient, In-Room Lighting: The normal lighting within clinical environments is rarely conducive to great imaging, as it is a blend of multiple lighting types (sunlight, fluorescent, and incandescent, all of which looks different in a camera), and multiple disadvantageous positions (backlighting from windows, strong overhead lighting from the ceiling, with uneven light coverage). If this is the only option, there are several things that can be done to improve the lighting in the image.
- Change the position of the subject to reduce any strong backlighting.
- If not using light from a window, consider closing the blinds as this will reduce the number of different light sources and “colors”, which can help improve the white balancing functions of the camera. Note that some rooms may not have sufficient other lighting from fluorescent and incandescent sources, so this may not be an option.
- Move the light nearer the patient, or the patient towards the light. The strength of light decreases dramatically as distance increases from the source (light follows what is called the ‘inverse square’ law), so some minor changes in position can go a long way to increase the effectiveness of in-room lighting.
Three-Point Lighting: Perhaps the most extensive lighting configuration that is likely to be applied to a room is the three-point lighting system. It consists of three separate lights positioned around a single subject, with these lights being referred to as key, fill, and back lights. This setup is not likely to be used in most scenarios, though some physicians and surgeons may desire to use such lighting if they deem it necessary. The space and setup requirements for this kind of lighting are fairly extensive, so is beyond the scope of most users. However, if setting this up, there are several key elements to keep in mind.
- The key light is the primary light source in the image, located off the camera and angled at the subject.
- The fill light is intended to fill the shadows left by the key light. It is located off the camera on the opposite side of the key light, and will typically be set to a lower power setting than the key light.
- The back light is used to separate the subject from the background. It is placed behind the subject and off to the same side as the fill light, so that it obliquely strikes the subject. This will create a highlight on the subject, and provide a rim of light that outlines the subject on a single side.

Three-Point Lighting Diagram
Macro Flash: The macro flash options on the market (different than the majority of the LED ring lights) are quite well developed and generally fit clinical needs very well. These lights attach directly to the end of the lens, providing a relatively flat, shadow-free light source. The primary concern with using a macro flash is in ensuring that it properly fits and works with the intended lens; some cheaper “kit” lenses will not work as well, because their lens extends and retracts while focusing and zooming on a subject. Typically, more expensive lenses or macro lenses will not suffer from this problem.
On-Camera Strobe: There are many options on the market for on-camera strobes and flashes. These mount into a hot shoe on the tops of the cameras, and usually have a rotating head that allows the light to be redirected at the subject. Some of these are fully manual, meaning that the user must manually set the flash power settings, while others are fully automated and communicate with the camera to establish power settings. The primary issue with on-camera flashes is the increase in shadows when imaging some subjects. It is possible to tilt the head of the flash to the ceiling on most of these flashes, which allows for the photographer to “bounce” the light off of the ceiling, providing a more even and broad light on the subject. This may require manual settings to optimize the photo, and may be prone to strange colorations if the ceiling or reflected surface is colored. On-camera flashes sometimes struggle to illuminate very near subjects, as the position of the lens and light produces strong shadows when used on very near subjects.
Built-In Flash: Some DSLR cameras offer the built-in flashes. These lights are prone to many of the same problems as on-camera flashes, and lack the ability to redirect the flash for bounce lighting. They are convenient when other lighting options are not available, but are generally not as ideal of a light source as macro and on-camera lights.
LED Ring Lights: The number of LED ring lights available on the market has dramatically increased in recent years. The lights, which mount directly to the lens in a manner similar to macro lights, often advertise great battery life, long bulb life, and ease of use. While all of these claims are true, only a handful of the lights provide sufficient light beyond more than 24 inches. A couple of more expensive LED lights do provide enough light for imaging from multiple feet away from the subject, but these lights are approaching the same price as other macro flashes, often requiring frequent battery recharges to provide lighting. The key benefits are that they provide constant light, which allows the photographer to see how well the subject is lit within the viewfinder, and that the cheaper models are typically significantly less expensive than most other options on the market. As with macro lenses, these lights sometimes cause issues when combined with cheaper lenses, as they may interfere with focusing and zoom functions of cheaper kit lenses.
LED Light Panels: Additional lights have come onto the market that are similar to LED ring lights, but that do not mount to the lens. These lights are small panels of LED lights that attach to a camera’s hot shoe flash mount. These lights have the same weaknesses as LED ring lights, with added cost of not being mounted to the lens, resulting in increased shadows on the subject due to interference from the lens.
Light Modifiers: Many different light modifiers are available on the market, ranging from diffusors, which are intended to soften lights, to reflectors, which are meant to redirect light, and grids, which are meant to limit the spread of light. Most of these items are not especially useful for clinical photography, though large-scale diffusors can help when combined with off-camera strobes.
The main claim that manufacturers present is that diffusors soften light, so they will offer small, plastic pieces to cover a direct light. This claim has mixed accuracy – the apparent softness of light relates to the size of the light source in relation to its brightness. Large umbrellas and softboxes make small flashes look much larger (multiple square feet instead of several square inches), and so soften the appearance of light. Some diffusors on multi-LED systems will take the many small points of light and give them a slightly larger apparent light source. Unfortunately, these diffusors also absorb some light, which means that the total brightness is reduced. Additionally, the effect of small diffusors over small lights is minimal, which makes the need for them debatable.
Back to Top